The Story Behind These Treats
These Soft Salmon Cat Treat Bites were inspired by Max… and one very unimpressed cat.
One rainy afternoon, I was in the kitchen prepping Max’s usual homemade dog meals when my neighbor stopped by with her cat, Luna, tucked inside her carrier. Luna is the definition of a picky eater. She’ll sniff something, give you a look of quiet judgment, and walk away as if you’ve offended her personally.
While Max eagerly watched a tray of fresh dog treats slide into the oven, Luna stared at her bowl of store-bought snacks with complete indifference. My neighbor sighed and said, “I wish someone made homemade treats for fussy cats like you do for dogs.”
That was all the motivation I needed.
I grabbed a can of salmon, cleared some counter space, and started experimenting. I knew two things right away: the treats had to be soft (because crunchy biscuits were always rejected), and the ingredients needed to be simple and gentle on sensitive stomachs. I reached for rolled oats something I always keep on hand and blended them into oat flour. The salmon was mashed until smooth and creamy so the texture would bake up tender and easy to chew.
The first batch wasn’t fancy. Just small, golden bites puffed slightly on parchment paper. The kitchen smelled like a seafood shop heavenly for cats, questionable for humans.
When they cooled, it was time for the real test.
Max waited hopefully, but this moment belonged to Luna. We placed one small bite in front of her and braced for the usual sniff-and-walk-away routine. Instead, she sniffed once… took a bite… and immediately pawed for more.
By the third treat, we were laughing. The picky queen had officially approved.
That whisker-twitching victory is exactly why I still make these bites for every cat parent who says, “Nothing works for my cat.”

How to Make Soft Salmon Cat Treat Bites
Ingredients
- 1 (6 oz) can salmon, drained very well (boneless, skinless, packed in water not oil or brine)
- 1 large egg
- ½ cup oat flour
- Up to 1 tablespoon dried catnip (optional)
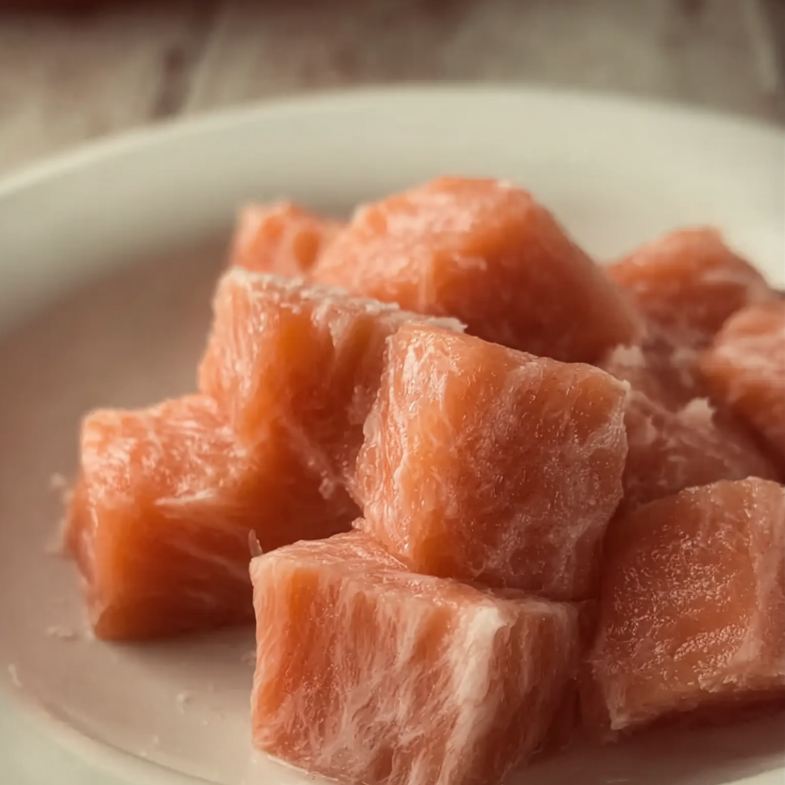
Start by draining the salmon thoroughly so the mixture doesn’t become watery. In a medium bowl or a food processor if you want an ultra-smooth texture mash the salmon until no large flakes remain.
Add the egg and oat flour, then mix until a soft dough forms. If using catnip, stir it in at this stage.
The dough should feel soft and slightly sticky, similar to thick cookie dough.
Adjusting the Texture
- If the dough feels too wet and loose, add oat flour 1 teaspoon at a time until it holds together when pinched.
- If it feels dry or crumbly, add water 1 teaspoon at a time until it becomes pliable.
You want a dough that can be rolled into small balls or gently flattened into tiny discs. They don’t need to look perfect your cat will be focused entirely on the aroma.
Make-Ahead & Storage Tips
These treats are perfect to keep on hand for nail trims, vet visits, or carrier training.
Once fully cooled:
- Store in an airtight container in the refrigerator for up to 5–7 days.
- Do not leave at room temperature for more than 1–2 hours due to the salmon and egg.
For longer storage:
- Freeze the bites in a single layer on a parchment-lined tray.
- Once solid, transfer to a freezer-safe bag or container.
- Use within 2 months for best freshness.
Thaw in the refrigerator overnight or let sit at room temperature for 5–10 minutes before serving. If they ever smell off or feel slimy, discard immediately.
Ingredient Tips & Fun Variations
For the best results:
- Use high-quality canned salmon packed in water.
- Avoid oil-packed or salted varieties.
- Mash the salmon thoroughly to maintain a soft texture.
- Make your own oat flour by blending plain rolled oats.
Once you’ve mastered the base recipe, you can try:
Texture Mix:
Bake half the batch slightly longer for a lightly crisp exterior while keeping the center tender.
Catnip Option:
Divide the dough in two one plain, one with catnip and see which your cat prefers.
Fun Shapes:
Press the dough into small silicone molds (hearts, stars, or tiny paws). Just keep them small enough for safe, one-bite treats.

A Little Kitchen Magic
There’s something special about baking for the small, furry heartbeat in your home. These Soft Salmon Cat Treat Bites aren’t just snacks they’re tiny rituals of care.
It’s the way your cat magically appears the moment salmon hits the air.
The slow blink of approval.
The soft paw reaching for another bite.
Those are the quiet memories that build a happy, loved life together.
I hope you try this recipe, personalize it for your own picky eater, and create your own approval moment.
Frequently Asked Questions
Can I use fresh salmon instead of canned?
Yes. Use fully cooked, boneless, skinless, unseasoned salmon. No oil, salt, garlic, or onion. Flake it very finely before mixing. You may need to add a teaspoon or two of water if the dough seems drier than usual. Make sure the salmon is completely cooled before adding the egg.
How long do these treats last?
Refrigerated in an airtight container, they last 5–7 days. Frozen, they keep well for up to 2 months. Always check for off smells, mold, or unusual texture before serving.
What if the dough is too dry or too wet?
Add water 1 teaspoon at a time if too dry.
Add oat flour 1 teaspoon at a time if too wet.
Small adjustments prevent the dough from becoming dense or gummy.

Tender Salmon Cat Bites for Fussy Felines
These Soft Salmon Cat Treat Bites were inspired by Max… and one very unimpressed cat.
One rainy afternoon, I was in the kitchen prepping Max’s usual homemade dog meals when my neighbor stopped by with her cat, Luna, tucked inside her carrier. Luna is the definition of a picky eater. She’ll sniff something, give you a look of quiet judgment, and walk away as if you’ve offended her personally.
While Max eagerly watched a tray of fresh dog treats slide into the oven, Luna stared at her bowl of store-bought snacks with complete indifference. My neighbor sighed and said, “I wish someone made homemade treats for fussy cats like you do for dogs.”
That was all the motivation I needed.
I grabbed a can of salmon, cleared some counter space, and started experimenting. I knew two things right away: the treats had to be soft (because crunchy biscuits were always rejected), and the ingredients needed to be simple and gentle on sensitive stomachs. I reached for rolled oats something I always keep on hand and blended them into oat flour. The salmon was mashed until smooth and creamy so the texture would bake up tender and easy to chew.
The first batch wasn’t fancy. Just small, golden bites puffed slightly on parchment paper. The kitchen smelled like a seafood shop heavenly for cats, questionable for humans.
When they cooled, it was time for the real test.
Max waited hopefully, but this moment belonged to Luna. We placed one small bite in front of her and braced for the usual sniff-and-walk-away routine. Instead, she sniffed once… took a bite… and immediately pawed for more.
By the third treat, we were laughing. The picky queen had officially approved.
That whisker-twitching victory is exactly why I still make these bites for every cat parent who says, “Nothing works for my cat.”
Ingredients
- 1 (6 oz) can salmon, drained very well (boneless, skinless, packed in water not oil or brine)
- 1 large egg
- ½ cup oat flour
- Up to 1 tablespoon dried catnip (optional)
Instructions
Preheat your oven to 350°F and prepare a baking sheet by lining it with parchment paper.
In a medium mixing bowl, add the well-drained salmon and mash it thoroughly with a fork until the texture is smooth and free of large flakes.
Crack in the egg, add the oat flour, and mix in the catnip if you’re using it. Stir everything together until a soft dough begins to form.
If the mixture feels dry or crumbly, add water gradually — just a small splash at a time mixing after each addition until the dough becomes soft and easy to scoop while still holding its shape.
Scoop out small portions and roll them into little balls or gently flatten them into discs about ½ inch wide.
Place the shaped bites onto the prepared baking sheet, leaving a bit of space between each one.
Bake for 10–15 minutes, until the treats are set and lightly golden around the edges while remaining soft in the center.
Notes
Once the treats have cooled completely, place them in an airtight container and store them in the refrigerator for up to 6 days.
For extended storage, freeze the baked treats for up to 2 months. When ready to use, thaw a few at a time in the refrigerator or let them sit at room temperature briefly before serving.
Nutrition Information:
Serving Size: 40 treatsAmount Per Serving: Calories: 10