The Sweet Story Behind This Recipe
The very first time I baked these Peanut Butter Bundt Cakes was on Benji’s Gotcha Day the anniversary of the day he joined our family. I wanted something a little more special than our everyday biscuits. As I reached to the back of the cabinet and pulled out my dusty mini Bundt pan the one usually reserved for human holiday desserts I remember smiling and thinking, why shouldn’t dogs get something this adorable too?
As I started mixing, oat flour lightly dusted the counter and a stubborn spoonful of peanut butter clung to the measuring cup. Meanwhile, Benji stationed himself at my feet, nose working overtime. Once the cakes went into the oven, the kitchen filled with that warm, nutty aroma, and he paced between the oven and his water bowl like he was personally supervising his cake order. By the time the timer chimed, he was already sitting in front of the oven door, tail sweeping the floor in happy anticipation.
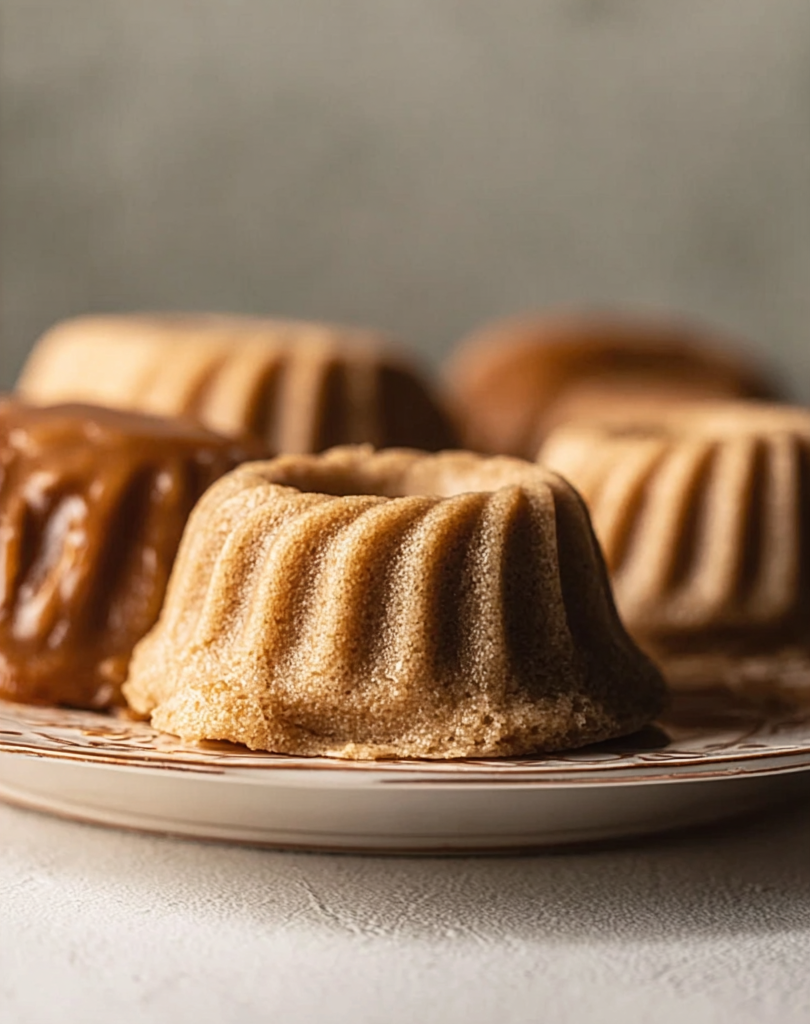
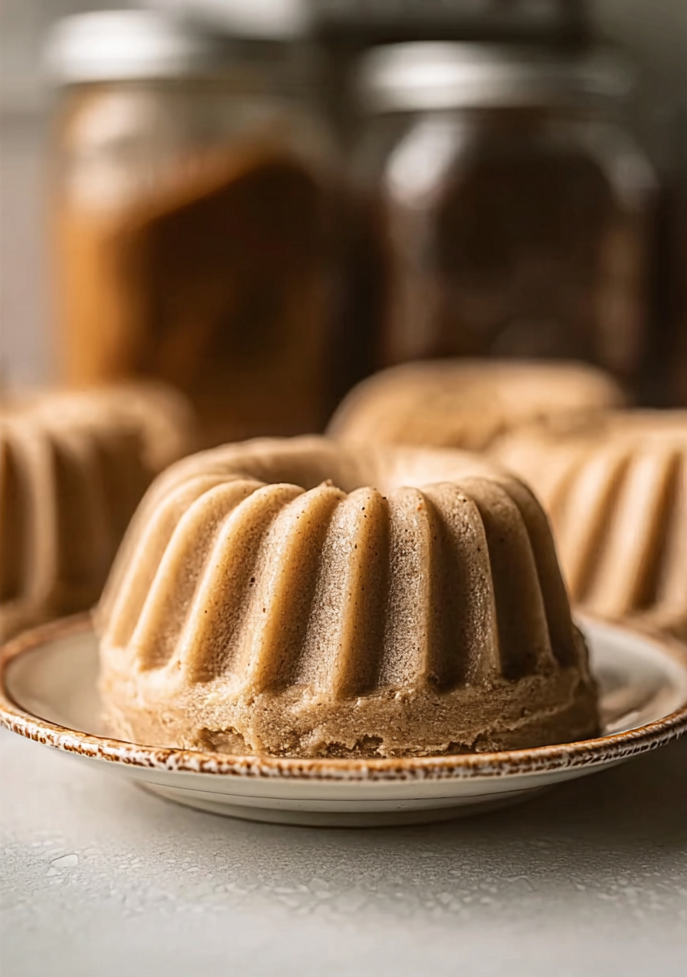
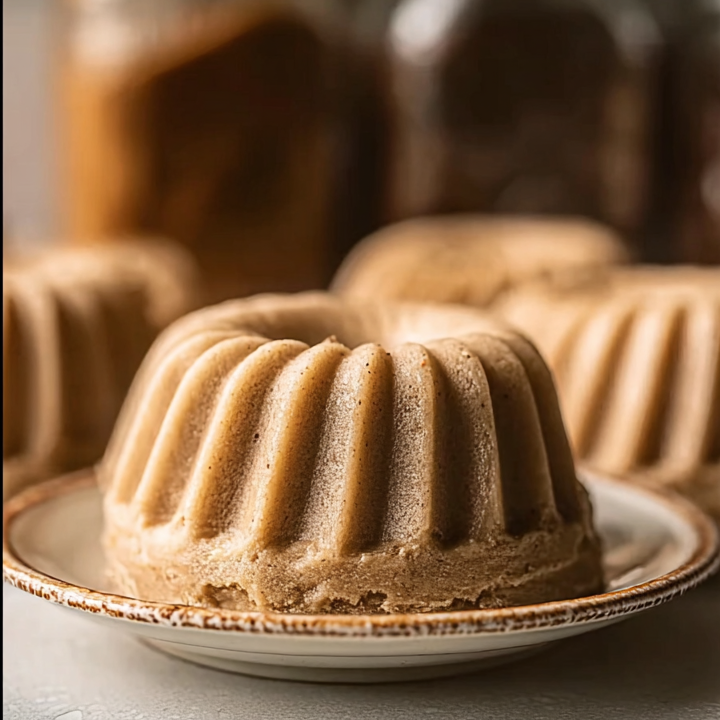
Since then, these little cakes have become our “celebration but keep it simple” treat. They look festive straight out of the pan with their pretty ridges, yet they’re made from pantry staples like oat flour, brown rice flour, applesauce, and trusty xylitol free peanut butter. They feel fancy without being complicated exactly the kind of homemade treat that says, you’re loved.
How to Make Peanut Butter Bundt Cakes (Ingredients & Mixing)
To keep the batter smooth and tender, start with two bowls: one for dry ingredients and one for wet.
In a medium bowl, whisk together:
- 1 cup oat flour
- ½ cup brown rice flour
- 1 teaspoon baking powder
- ½ teaspoon baking soda
Mix until evenly combined. If you’re making your own oat flour from rolled oats, pulse it finely for a soft texture. Lightly grease your mini Bundt pan with coconut oil and set aside.
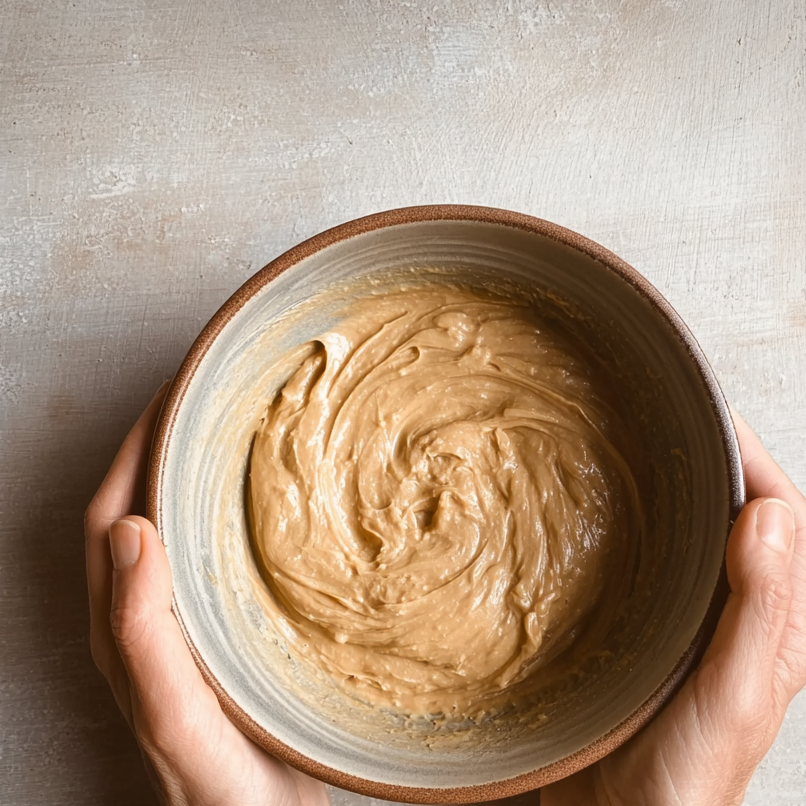
In a larger bowl, stir together:
- ½ cup natural peanut butter (100% xylitol-free)
- ⅓ cup unsweetened applesauce
Mix until smooth and glossy. Then whisk in:
- ½ cup coconut milk
- 2 tablespoons melted coconut oil
- 1 large egg
Make sure the egg is fully incorporated with no visible streaks. The mixture should resemble thick pancake batter. If it feels too dense, add a tablespoon of coconut milk at a time until pourable.
Gradually fold the dry ingredients into the wet mixture, stirring gently just until no dry flour remains. A few small lumps are perfectly fine overmixing can make the cakes dense.
Spoon the batter into the prepared mini Bundt pan, filling each cavity about ¾ full to allow room for rising. Bake until set and lightly golden.
Let cool completely before serving.
Make Ahead & Storage Tips
These cakes are perfect for planning ahead.
Once fully cooled:
- Store at room temperature for up to 2 days in an airtight container.
- Refrigerate for 4–6 days.
- Layer with parchment paper if stacking to prevent sticking.
Refrigerated cakes become slightly denser and softer, which many dogs love.
For longer storage:
- Freeze cakes in a single layer on a tray until firm.
- Transfer to a freezer safe bag or container.
- Store for up to 2–3 months.
Thaw overnight in the fridge or let sit at room temperature for 20–30 minutes. If warming briefly in the microwave, make sure the cake is cool to the touch before serving.
Always check for mold, unusual odor, or sogginess before giving any stored treat to your dog.
Ingredient Notes & Fun Party Variations
The beauty of this recipe lies in its simple, dog safe ingredients.
- Oat flour & brown rice flour create a soft, tender crumb.
- Natural peanut butter gives that irresistible nutty flavor (always double check it contains no xylitol).
- Unsweetened applesauce adds moisture without refined sugar.
- Coconut milk and coconut oil create a rich, bakery style feel.
For fun variations:
- Add finely shredded carrot for color and extra nutrients.
- Mix in mashed banana for a naturally sweeter birthday version.
- Top with a simple “frosting” made from plain Greek yogurt mixed with a little peanut butter. Chill to firm before serving.
- Use a mini muffin tin for bite sized portions for small dogs or multi dog households.
These pair beautifully with softer treats like pumpkin muffins or chilled yogurt bites if you’re planning a full pup celebration spread.
Final Thoughts
The best recipes aren’t just about ingredients they’re about moments. From the first whisk to the happy tail wag at serving time, these Peanut Butter Bundt Cakes turn an ordinary afternoon into something memorable.
Whether it’s a birthday, a Gotcha Day, a successful vet visit, or simply a day that deserves a little extra joy, this recipe helps you celebrate the bond you share with your dog.
Flour dusted counters, eager paws waiting by the oven, and that first excited sniff those are the memories that last.
Frequently Asked Questions
Are these Peanut Butter Bundt Cakes safe for dogs?
Yes, when made with dog safe ingredients. Always use natural peanut butter that is 100% xylitol-free. If your dog has allergies to grains, peanuts, or coconut, consult your veterinarian before serving. Introduce new treats gradually and monitor for any signs of digestive upset.
What peanut butter should I use?
Choose natural, unsweetened peanut butter that lists only peanuts (and possibly salt) as ingredients. Avoid anything containing xylitol, chocolate, added sugars, or artificial sweeteners. Creamy peanut butter works best for a smooth batter.
How do I store leftovers?
Allow cakes to cool completely before storing. Refrigerate in an airtight container for up to 5 days or freeze for up to 3 months. Thaw fully before serving and ensure the cake is not hot.
Mini Peanut Butter Bundt Dog Treat Cakes
The very first time I baked these Peanut Butter Bundt Cakes was on Max’s Gotcha Day the anniversary of the day he joined our family. I wanted something a little more special than our everyday biscuits. As I reached to the back of the cabinet and pulled out my dusty mini Bundt pan the one usually reserved for human holiday desserts I remember smiling and thinking, why shouldn’t dogs get something this adorable too?
As I started mixing, oat flour lightly dusted the counter and a stubborn spoonful of peanut butter clung to the measuring cup. Meanwhile, Max stationed himself at my feet, nose working overtime. Once the cakes went into the oven, the kitchen filled with that warm, nutty aroma, and he paced between the oven and his water bowl like he was personally supervising his cake order. By the time the timer chimed, he was already sitting in front of the oven door, tail sweeping the floor in happy anticipation.
Since then, these little cakes have become our “celebration but keep it simple” treat. They look festive straight out of the pan with their pretty ridges, yet they’re made from pantry staples like oat flour, brown rice flour, applesauce, and trusty xylitol free peanut butter. They feel fancy without being complicated exactly the kind of homemade treat that says, you’re loved.
Ingredients
- In a medium bowl, whisk together:
- 1 cup oat flour
- ½ cup brown rice flour
- 1 teaspoon baking powder
- ½ teaspoon baking soda
- Mix until evenly combined. If you’re making your own oat flour from rolled oats, pulse it finely for a soft texture. Lightly grease your mini Bundt pan with coconut oil and set aside.
- In a larger bowl, stir together:
- ½ cup natural peanut butter (100% xylitol-free)
- ⅓ cup unsweetened applesauce
- Mix until smooth and glossy. Then whisk in:
- ½ cup coconut milk
- 2 tablespoons melted coconut oil
- 1 large egg
Instructions
Preheat your oven to 350°F (175°C) and lightly coat a 6-cavity mini Bundt pan with a thin layer of coconut oil, making sure to get into all the grooves so the cakes release easily later.
In a medium mixing bowl, whisk together the oat flour, brown rice flour, baking powder, and baking soda until evenly blended and free of streaks.
In a separate large bowl, combine the peanut butter and unsweetened applesauce, stirring until the mixture is smooth and creamy. Add the coconut milk, melted coconut oil, and egg, then whisk thoroughly until the batter looks uniform and the egg is fully incorporated.
Gradually fold the dry ingredients into the wet mixture using a spatula. Stir gently just until no dry flour is visible. Avoid overmixing, as this can make the cakes dense a few small lumps are perfectly fine.
Spoon the batter evenly into the prepared mini Bundt pan, filling each cavity about three-quarters full to allow space for rising.
Bake for 18–20 minutes, or until the cakes are set and a toothpick inserted into the center comes out clean.
Remove the pan from the oven and let the cakes cool for about 10 minutes inside the pan. If needed, gently loosen the edges with a small spatula before carefully inverting the pan onto a wire rack.
Notes
Allow the cakes to cool fully before offering them to your dog to prevent any risk of mouth burns.
Once cooled, store the cakes in an airtight container at room temperature for up to 2 days, or refrigerate them for up to 6 days for added freshness.
To keep them longer, freeze the cakes in a single layer until solid, then transfer them to a freezer-safe bag or container. They will stay fresh for up to 2 months. Thaw in the refrigerator before serving.
Serve the cakes as they are, or crumble a small portion over your dog’s regular meal for an extra-special surprise.
Nutrition Information:
Yield: 6 Serving Size: 6 mini Bundt cakesAmount Per Serving: Calories: 170