Why You Can Trust This Recipe
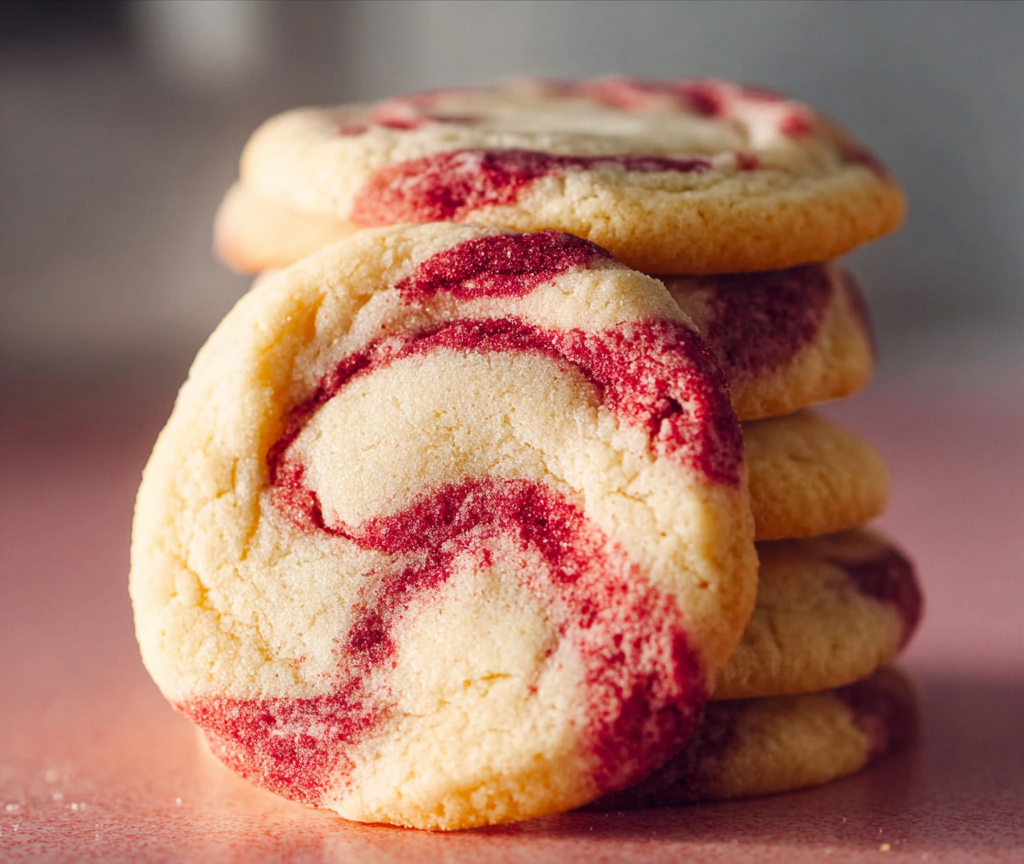
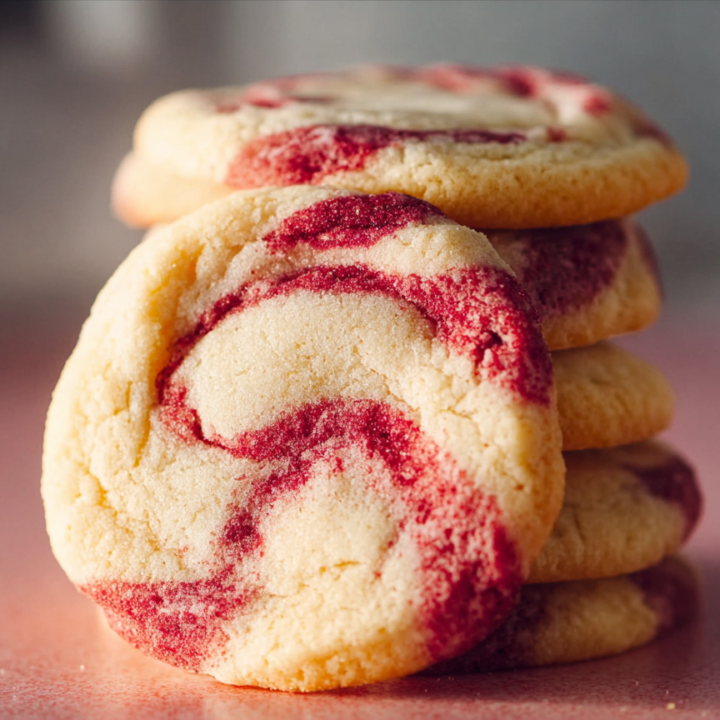
These Peanut Butter Banana Twist Dog Treats are designed to give you exactly what most dog parents are looking for: a crunchy, homemade snack your pup adores and ingredients you feel confident serving.
Instead of guessing which ingredients “sound healthy,” I built this recipe with guidance from a veterinary nutrition professional and focused on keeping everything simple, purposeful, and easy to understand. No added sugar. No salt. No unnecessary fillers. Just a short ingredient list that lets you clearly see what’s going into your dog’s body.
Each ingredient plays a specific role. Peanut butter delivers protein and rich flavor. Banana adds natural sweetness and potassium. The grain base provides structure and that satisfying crunch dogs love. After testing different flour options and ingredient ratios, I narrowed it down to what worked best for digestion, texture, and consistency. If you already prepare homemade meals or treats for your dog, these twists fit perfectly into that routine.
In my own kitchen, I made multiple batches with Max happily supervising. I paid close attention to bake times, texture after cooling, and how well the twists held up after days in a container and weeks in the freezer. I checked for crumbling, overbrowning, and that ideal light golden finish. The step-by-step method below includes those small but important cues how the dough should feel, how thin to roll it, and how to know when they’re done. No advanced baking skills required. Just follow along and trust what you see and feel.
Step-by-Step Method
Start by preheating your oven and lining a baking sheet with parchment paper to prevent sticking and promote even baking.
In a medium bowl, mash a ripe banana until mostly smooth. A few small soft pieces are fine if you like a bit of texture. Add the peanut butter, water, and any dog-safe optional add-ins. Stir until the mixture looks thick and fully blended, with no peanut butter streaks at the bottom.
Gradually add the flour, stirring gently at first. Once the dough becomes too thick for a spoon, switch to kneading lightly with your hands. You’re aiming for a soft dough that holds together and feels slightly tacky but not sticky enough to cling heavily to your fingers.
If it feels too sticky, sprinkle in a tablespoon of flour. If it feels dry or crumbly, add a teaspoon of water at a time until smooth and workable.
Lightly flour your countertop and roll the dough into a rectangle about ½ centimeter thick similar to rolled sugar cookie dough. Using a sharp knife or pizza cutter, slice long strips roughly the width of your finger. Twist two strips together from end to end to form a spiral shape. For smaller dogs, cut the strips shorter before twisting to create mini versions.
Place each twist on the prepared baking sheet, leaving a little space between them. Bake for approximately 18 to 22 minutes, or until the edges turn light golden and the centers feel firm.
Transfer the treats to a wire rack and allow them to cool completely. As they cool, they’ll firm up further and develop their final crunch. Before serving, break one open. The inside should appear dry rather than soft or doughy.
Storage and Freshness Tips
Once completely cooled, store the twists in an airtight container at room temperature for about 5 to 7 days, provided your kitchen isn’t very warm or humid. Labeling the container with the baking date can help you keep track.
If the treats soften slightly after a couple of days, you can refresh them by placing them in a low oven for a few minutes. Let them cool fully before returning them to storage to prevent moisture buildup.
For longer storage, freeze the twists for up to 2 to 3 months. Freeze them in a single layer first, then transfer to a freezer-safe bag and remove as much air as possible. Thaw at room temperature before serving.
Always inspect treats for any unusual smell, discoloration, or freezer burn before offering them to your dog.
Easy Swaps and Fun Variations
This recipe is flexible if your pantry or your dog’s needs require adjustments.
- Swap peanut butter for unsweetened pumpkin puree for a lower-fat option.
- Use plain mashed sweet potato for a gentle alternative.
- Replace part of the flour with oat flour if your dog tolerates it better.
- If your banana isn’t very ripe, add a small splash of warm water to help soften the dough.
Be sure any nut butter used is plain, unsalted, and completely free of xylitol.
For special occasions, you can:
- Press a few blueberries into the strips before twisting.
- Sprinkle lightly with unsweetened shredded coconut.
- Crumble a baked twist over plain yogurt and freeze for a cool summer snack.
For tiny dogs, roll thinner strips and make smaller twists to control portion size. For senior dogs needing softer textures, bake slightly less and store those treats in the refrigerator, using them within a few days.
Final Thoughts
There’s something special about pulling a tray of homemade dog treats from the oven. Every time I make these, Max appears in the kitchen before they’re even finished cooling, nose working and tail thumping.
These Peanut Butter Banana Twist Dog Treats are more than just a crunchy snack. They’re a simple way to slow down, bake with intention, and create a small moment of connection with your dog. Whether you’re preparing a weekend batch or baking something special for a celebration, these twists easily become part of a joyful routine.
I hope you give them a try and get to see that excited first crunch for yourself.
Healthy Peanut Butter & Banana Twists for Dogs
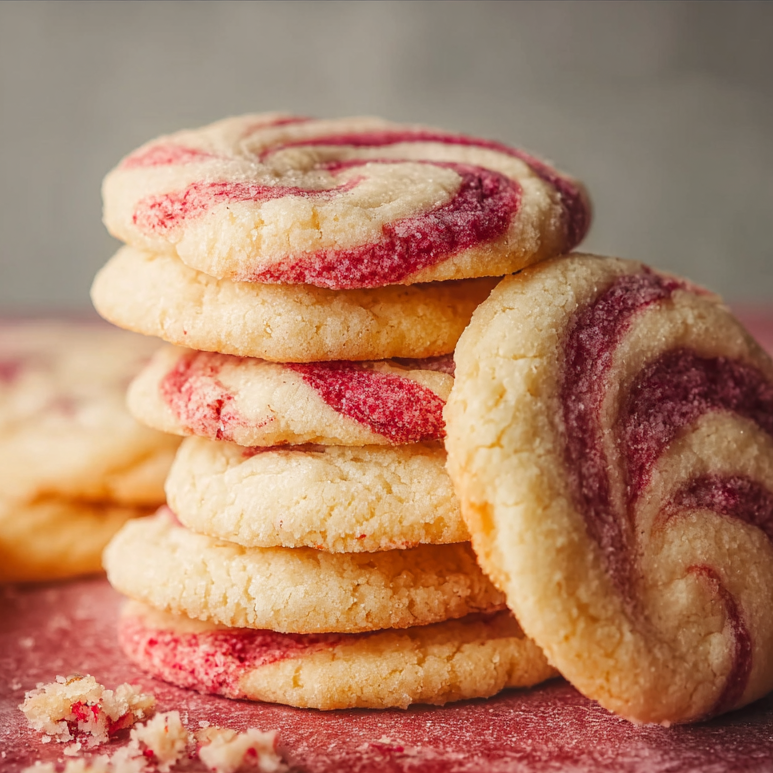
These Peanut Butter Banana Twist Dog Treats are designed to give you exactly what most dog parents are looking for: a crunchy, homemade snack your pup adores and ingredients you feel confident serving.
Instead of guessing which ingredients “sound healthy,” I built this recipe with guidance from a veterinary nutrition professional and focused on keeping everything simple, purposeful, and easy to understand. No added sugar. No salt. No unnecessary fillers. Just a short ingredient list that lets you clearly see what’s going into your dog’s body.
Each ingredient plays a specific role. Peanut butter delivers protein and rich flavor. Banana adds natural sweetness and potassium. The grain base provides structure and that satisfying crunch dogs love. After testing different flour options and ingredient ratios, I narrowed it down to what worked best for digestion, texture, and consistency. If you already prepare homemade meals or treats for your dog, these twists fit perfectly into that routine.
In my own kitchen, I made multiple batches with Max happily supervising. I paid close attention to bake times, texture after cooling, and how well the twists held up after days in a container and weeks in the freezer. I checked for crumbling, overbrowning, and that ideal light golden finish. The step-by-step method below includes those small but important cues how the dough should feel, how thin to roll it, and how to know when they’re done. No advanced baking skills required. Just follow along and trust what you see and feel.
Ingredients
- 1 medium ripe banana, mashed until smooth
- ½ cup natural unsweetened peanut butter (make sure it contains no xylitol)
- ¼ cup water
- 1½ cups whole wheat flour, plus a little extra for dusting and rolling
Instructions
Preheat your oven to 350°F (175°C) and prepare a baking sheet with parchment paper or a silicone mat to prevent sticking.
Place the mashed banana in a medium mixing bowl and mash it until mostly smooth, leaving only small soft lumps if desired. Add the peanut butter and water, then stir well until the mixture becomes creamy and fully blended.
Gradually mix in the whole wheat flour, stirring as you go, until a soft dough begins to come together. Once it thickens, use your hands to gently knead the dough in the bowl. It should feel smooth and slightly tacky but not cling heavily to your fingers. If it feels too sticky, work in a small amount of extra flour until manageable.
Lightly dust a clean surface with flour and roll the dough out into a rectangle about ¼ inch thick. Using a sharp knife or pizza cutter, cut the dough into long strips roughly ½ inch wide.
Take two strips at a time and twist them together from one end to the other to create a spiral shape. Place each twist onto the prepared baking sheet, leaving a bit of space between them. Continue until all the dough is used.
Bake for 18 to 20 minutes, or until the edges turn lightly golden and the centers feel firm. Remove from the oven and transfer the treats to a wire rack. Allow them to cool completely so they crisp up before serving them to your dog.
Notes
- Always choose peanut butter that is completely free of xylitol and contains no added sugar or salt.
If you’re baking for a small dog, trim the dough strips into shorter lengths before twisting so the finished treats are bite-sized and easier to chew.
Nutrition Information:
Serving Size: 24 treatsAmount Per Serving: Calories: 45