
It began on a cool October morning the kind where the air smells like cinnamon and fallen leaves. Scout, my golden retriever and loyal kitchen companion, was pacing by the oven, waiting for whatever magic might come out of it. But this time, I wasn’t baking human cookies. I was testing a homemade treat just for him simple, wholesome, and full of good ingredients. That’s the day sweet potato chew sticks became part of our routine, and honestly, we’ve never looked back.
Scout’s tail was thumping against the hardwood by the time the first batch finished baking. I’ll never forget the sound of that first satisfying crunch echoing down the hallway or the hopeful puppy eyes that followed, clearly asking for seconds. Ever since, these sweet potato chew sticks have earned a permanent spot in our treat rotation.
Why Sweet Potatoes Are the Perfect Choice
Sweet potatoes aren’t just a tasty root vegetable they’re packed with dog friendly nutrition. High in fiber, beta carotene, and vitamins like B6 and C, they help support digestion, immune health, and overall well being. And unlike many store bought treats filled with artificial flavors or preservatives, sweet potatoes are real, whole food.
Their natural sweetness and starchiness make them perfect for chewy treats once dehydrated. Dogs love the soft chew and gentle sweetness, and we dog parents love knowing exactly what we’re feeding them.
Ingredients You’ll Need
These sweet potato chew sticks are wonderfully simple no complicated tools or endless shopping lists. Chances are, you already have everything ready to go.
You’ll need:
- 2 large sweet potatoes (organic if you can)
- Optional: a light dusting of cinnamon or turmeric for an extra nutritional boost
- Optional: 1 tablespoon coconut oil for added flavor and shine
That’s it. No fillers, no preservatives, no confusing additives just wholesome, real ingredient
How to Make the Perfect Sweet Potato Chews
1. Wash & Slice
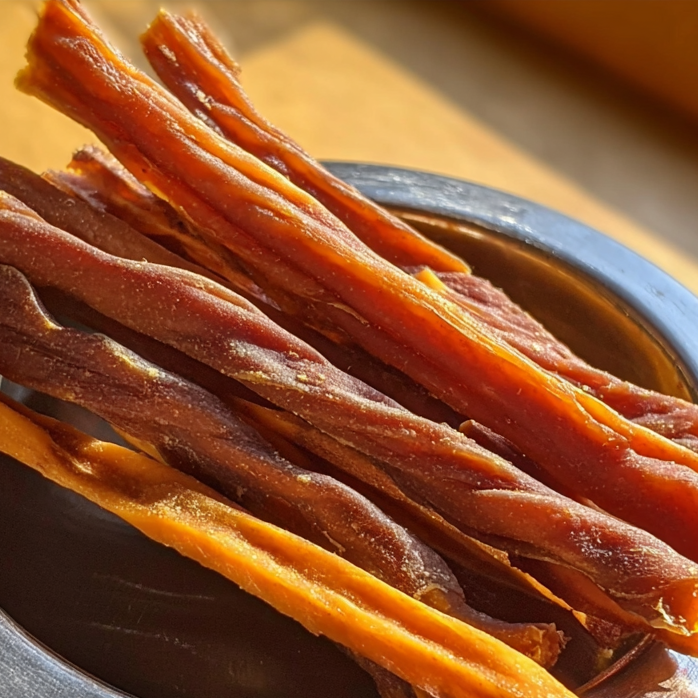
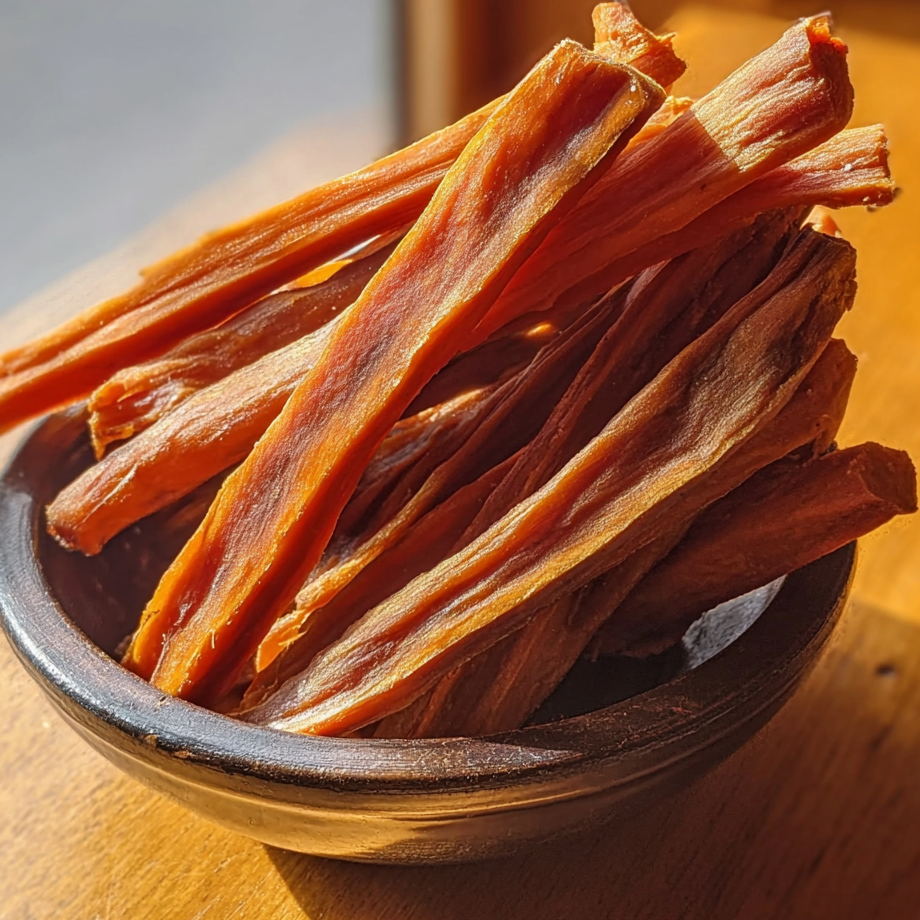
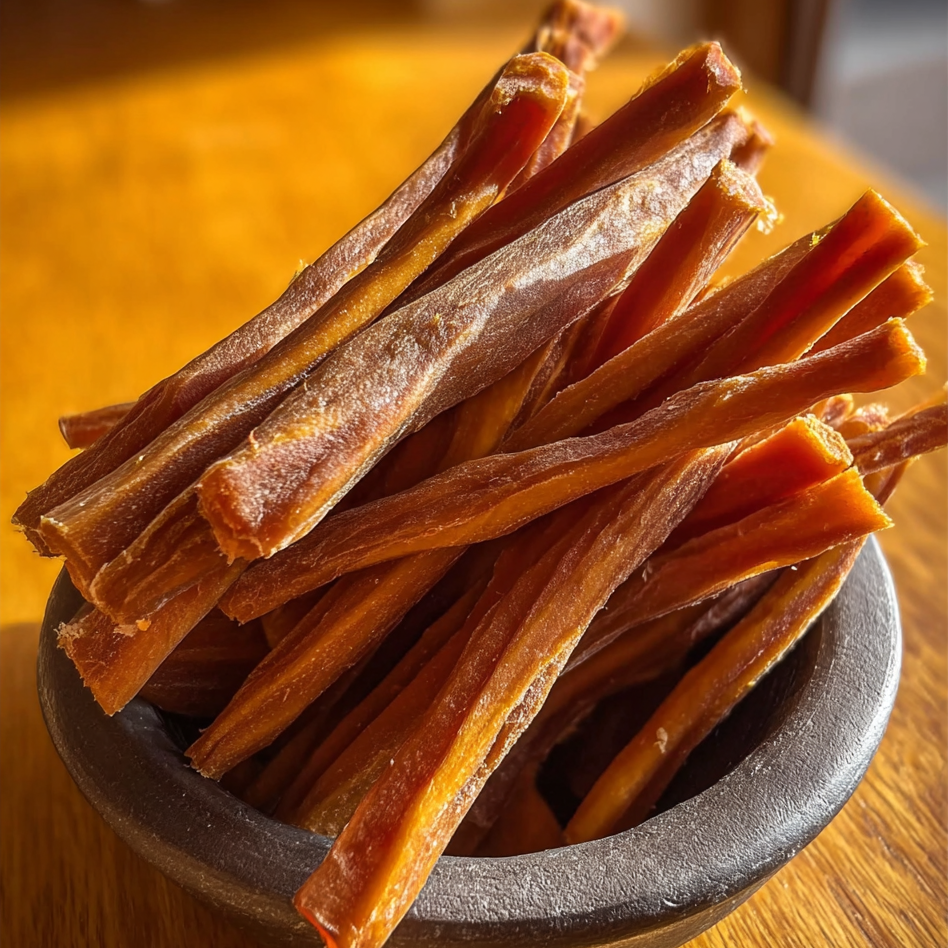
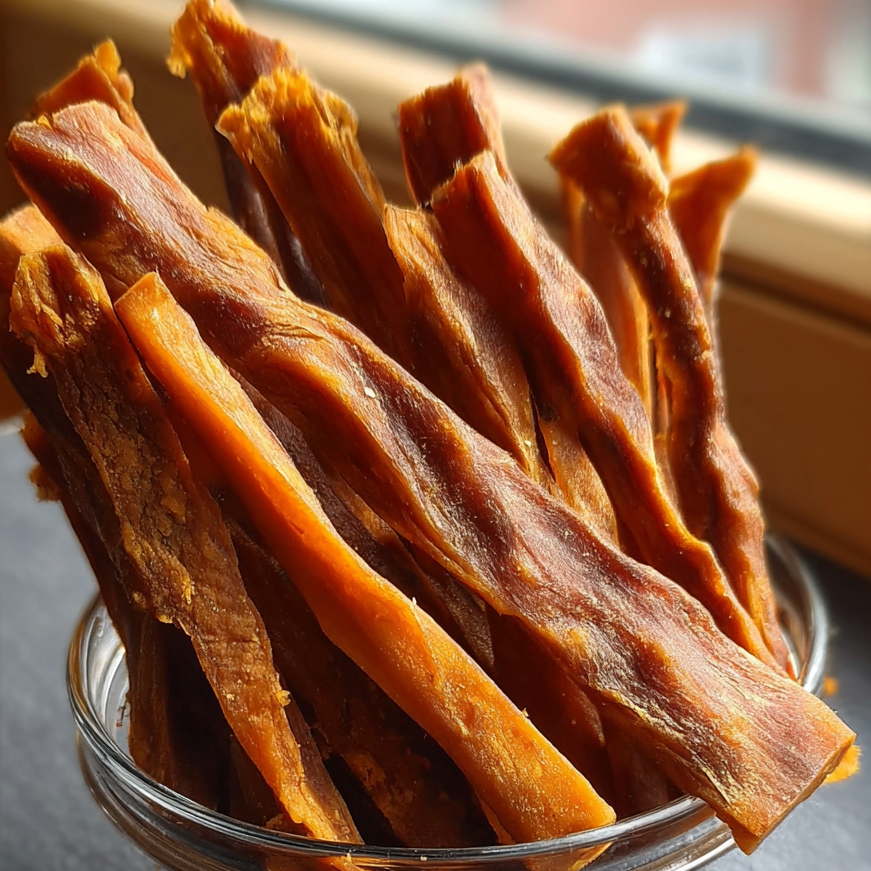
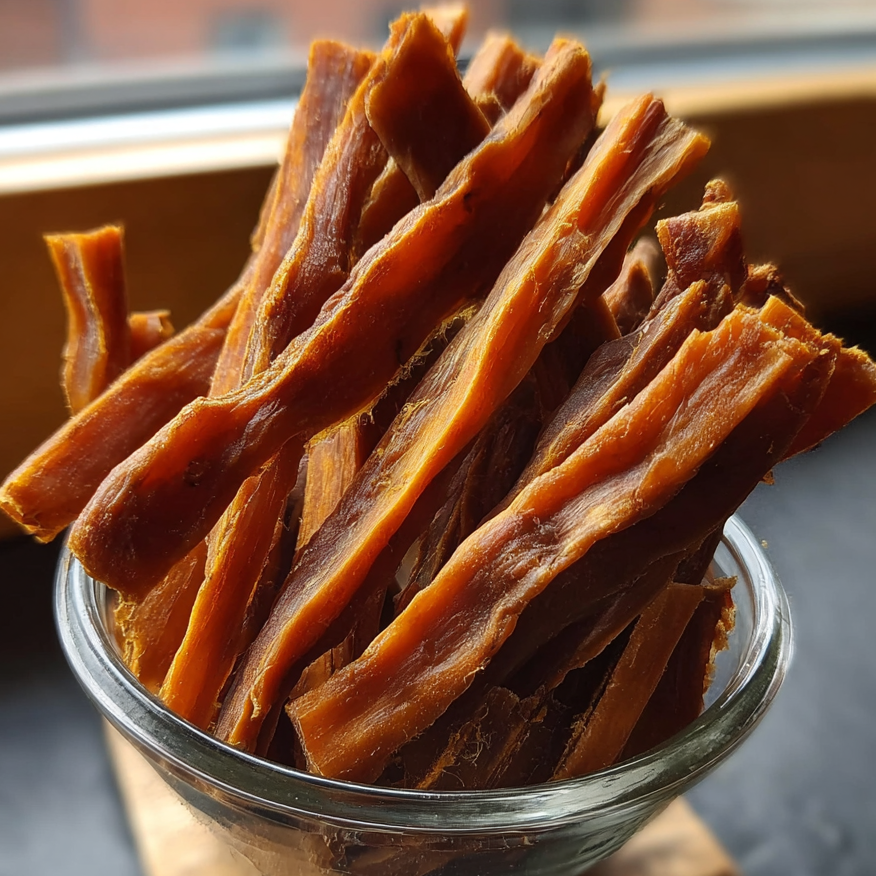
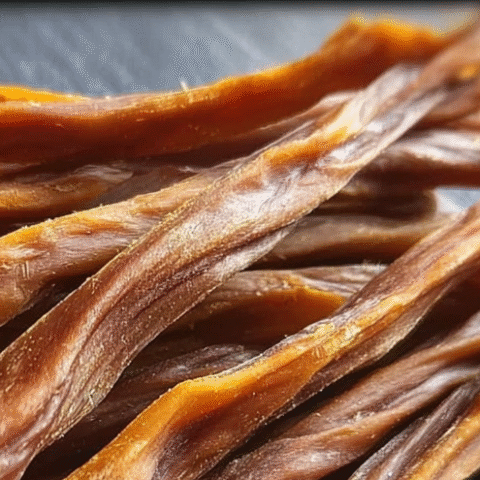
Give the sweet potatoes a good scrub. I like leaving the skins on for extra fiber, but you can peel them if your pup has a sensitive stomach. Slice them lengthwise into long strips, about ¼ inch thick. Too thin and they’ll crisp up; too thick and they won’t dry evenly.
2. Optional: Add a Flavor Boost
If you’d like, brush the slices lightly with melted coconut oil and sprinkle a bit of cinnamon or turmeric. Turmeric has natural anti inflammatory benefits great for senior pups and cinnamon adds a warm aroma dogs love.
3. Dehydrate
Preheat the oven to 250°F (120°C). Arrange the slices in a single layer on a parchment lined baking sheet. Make sure nothing overlaps.
Bake for 2½–3 hours, flipping halfway through. You’re aiming for a leathery, chewy texture not crispy and not soft. Have a dehydrator? Even better. Set it to 130–140°F and let them dry for 6–8 hours.
4. Cool & Store
Let the chews cool completely before serving. Store them in an airtight container in the fridge for up to 3 weeks, or freeze for longer storage.
Scout always knows the moment I open the container he can tell his treats from mine. And honestly, with chews this good, I understand why.
How to Customize This Sweet Potato Treat
Get Creative with Your Chews
Experiment with Shapes
While long sticks are great for easy chewing, feel free to get creative cut the sweet potatoes into rounds, cubes, or even fun shapes with cookie cutters for a festive twist.
Add a Savory Twist
Wrap a thin slice of chicken breast around each stick before baking for a savory sweet treat. It adds extra protein and can make the chews irresistible to picky pups. Just keep in mind this version will need refrigeration and won’t last as long.
Try Other Tasty Additions
A light brush of unsweetened applesauce? Delicious. A tiny dollop of homemade peanut butter for dogs? Instant tail wags.
The best part of homemade treats is the freedom to adapt them to your dog’s preferences and dietary needs.
Treats That Help Keep Teeth Clean and Strong
What amazed me most about these chew sticks was their impact on Scout’s dental health. The chewing action naturally helps reduce plaque and keeps his gums stimulated perfect for dogs who aren’t exactly enthusiastic about brushing.
Of course, sweet potato chew sticks aren’t a substitute for regular dental care, but they make a fantastic addition to a healthy routine. Combine that with how simple and budget friendly they are to make, and it’s a total win for both pups and their humans.
Why Homemade Chews Outshine Store-Bought Options
Before I started making treats at home, I used to buy those store bought jerky strips. They often smelled artificial, felt greasy, and worst of all sometimes upset Scout’s stomach.
Switching to homemade sweet potato chews completely changed the game. They’re simple to make, cost effective in the long run, and give me full control over exactly what Scout is eating wholesome, real ingredients every time.
Simple Rituals, Lasting Bonds
There’s something truly special about making food for someone you love especially when that someone has four paws, a wagging tail, and eyes full of trust. Every time I bake a fresh batch of sweet potato chew sticks, it feels like I’m deepening the bond between Scout and me just a little more.
These treats are about more than just wholesome ingredients they’re part of a comforting routine. When Scout hears the oven preheating, he pads into the kitchen and settles in his usual spot, ears alert. It’s his quiet way of saying, “Chew stick time, right?”
Sweet Potato Chews: Delicious Variations for Every Season
One of the reasons I stick with this recipe year round is how easily it adapts to each season. In the summer, I sometimes freeze the baked sticks for a refreshing, popsicle like treat Scout can’t get enough. Come fall, I might mix in a touch of pumpkin puree or pair the chews with a batch of Pumpkin Pupsicles for Dogs, adding cozy, earthy flavors that match the season.
During the winter holidays, I like to cut the sweet potatoes into stars or tree shapes and tie a few together with jute string as festive stocking stuffers for neighborhood pups. It’s a joyful way to spread some homemade love to other dog families.
Keeping Your Sweet Potato Chews Fresh and Chewy
Since these treats don’t contain preservatives, proper storage is key. Here’s what I’ve learned through trial (and a few smelly mistakes):
- Room Temperature (airtight container): 5–7 days
- Refrigerated: Up to 3 weeks
- Frozen: 2–3 months (use freezer safe bags)
I usually freeze half the batch right after making it so there’s always a backup on hand. You can defrost overnight in the fridge or leave them at room temperature for 10–15 minutes if you need them quickly. Either way, the chews stay perfectly chewy.
A little color change over time is normal it’s just natural oxidation and doesn’t affect the taste or quality.
Your Questions Answered: Sweet Potato Treats
Over the years, I’ve had a few friends ask about these treats after seeing them in my kitchen or catching Scout mid chew. Here are some of the most common questions I get answered from one dog lover to another:
“Can I use a different kind of potato?”
Technically, yes but sweet potatoes (especially orange or purple varieties) are the best choice for their natural sweetness and nutritional benefits. White potatoes don’t offer the same fiber or vitamins and can bake differently.
“How thick should the slices be?”
Aim for about ¼ inch for a chewy texture. Slice thinner (around ⅛ inch) for a crispier treat, or thicker (about ⅓ inch) if your dog enjoys a more substantial gnawing challenge. Just keep in mind that thicker slices may need extra baking time.
“Are these safe for puppies?”
Absolutely! Just adjust the size and texture for your puppy’s age and teeth. For teething pups, thinner slices baked until lightly crisp can help soothe sore gums.
“What about dogs with allergies?”
These chews are naturally grain free, dairy free, and meat free (unless you choose to add meat). They’re a great hypoallergenic option. Just be mindful of any optional add-ins like peanut butter or oils.
A Treat That Combines Simplicity with Love
What I love most about sweet potato chew sticks is the mindset they represent: choosing simplicity over complexity, nourishment over convenience, and presence over rush. There’s no marketing gimmick, no flashy packaging just a sweet potato, a knife, a warm oven, and the simple joy of creating something wholesome by hand.
It may seem like a small gesture, but it carries real meaning.
When I share these treats with Scout, I’m not just feeding him. I’m honoring his place in our family. I’m saying, “I see you. I care. I want the very best for you.” And at its heart, isn’t that what every great recipe does?
Quick Recap: Sweet Potato Chews Your Dog Will Love
Quick Reference: Sweet Potato Chew Sticks
Ingredients:
- 2 large sweet potatoes
- Optional: coconut oil, cinnamon, turmeric
Instructions:
- Preheat the oven to 250°F (120°C).
- Wash and slice sweet potatoes lengthwise into ¼ inch strips.
- Optional: Brush with coconut oil and sprinkle with cinnamon or turmeric.
- Bake for 2½–3 hours, flipping halfway through, until chewy.
- Let cool completely before storing.
- Store in an airtight container in the fridge or freezer for later.
Explore More Homemade Treats for Happy Pups
Once you start making sweet potato chew sticks, it’s easy to get hooked on homemade dog recipes just like I did. One recipe quickly became five, and now I’m always experimenting based on Scout’s favorites.
to clever storage tips and festive, holiday themed snack bundles.
The Joy of Doing It Yourself
Making these treats is about more than nutrition it’s about heart. When I see Scout eagerly waiting by the oven or trotting off with his tail held high after getting a chew stick, I know we’re sharing more than just a snack.
We’re savoring a small, meaningful moment together.
Whether you’re baking for a birthday, prepping for the holidays, or enjoying a quiet Sunday afternoon with your furry companion, know this: you’re giving your dog something truly special. Not just a treat, but love in every bite.
Here’s to full bellies, wagging tails, and countless homemade adventures.
Easy Homemade Sweet Potato Chew Sticks For Dogs
It began on a cool October morning the kind where the air smells like cinnamon and fallen leaves. Scout, my golden retriever and loyal kitchen companion, was pacing by the oven, waiting for whatever magic might come out of it. But this time, I wasn’t baking human cookies. I was testing a homemade treat just for him simple, wholesome, and full of good ingredients. That’s the day sweet potato chew sticks became part of our routine, and honestly, we’ve never looked back.
Scout’s tail was thumping against the hardwood by the time the first batch finished baking. I’ll never forget the sound of that first satisfying crunch echoing down the hallway or the hopeful puppy eyes that followed, clearly asking for seconds. Ever since, these sweet potato chew sticks have earned a permanent spot in our treat rotation.
Ingredients
- 2 large sweet potatoes (organic if you can)
- Optional: a light dusting of cinnamon or turmeric for an extra nutritional boost
- Optional: 1 tablespoon coconut oil for added flavor and shine
Instructions
- Preheat the oven to 250°F (120°C).
- Wash and slice sweet potatoes lengthwise into ¼-inch strips.
- Optional: Brush with coconut oil and sprinkle with cinnamon or turmeric.
- Bake for 2½–3 hours, flipping halfway through, until chewy.
- Let cool completely before storing.
- Store in an airtight container in the fridge or freezer for later.