If you’ve ever looked into your dog’s eyes and felt the urge to spoil them just a little more, you’re definitely not alone. Making homemade dog treats isn’t just about snacks it’s about celebrating the bond we share with our pups. That’s exactly how these Banana Peanut Butter Dog Paw Cookies came to life.
They’re wholesome, easy to make, and shaped like adorable paw prints for an extra dose of charm. With simple, dog-safe ingredients and a flavor combo dogs love, these cookies are perfect for everyday treating or special occasions.
Let’s get baking!
Why Make Homemade Dog Treats?
When you bake at home, you know exactly what goes into your dog’s treats. Many store-bought options contain additives, preservatives, or fillers that aren’t ideal for sensitive tummies. Homemade treats let you control the ingredients and customize flavors your pup truly enjoys.
This recipe uses bananas and peanut butter wo nutritious, dog-approved staples. Bananas provide potassium and fiber, while natural peanut butter offers healthy fats and protein (just be sure it’s xylitol-free).
Ingredients
- 1 ripe banana, mashed
- ½ cup natural peanut butter (xylitol-free)
- 1 large egg
- 1 cup oat flour (or finely blended rolled oats)
- ¼ cup unsweetened applesauce
- Optional: dog-safe carob chips for decoration
Step-by-Step Instructions
1. Preheat & Prepare
Preheat your oven to 325°F (165°C) and line a baking sheet with parchment paper.
2. Mash the Banana
In a mixing bowl, mash the banana until smooth. The riper the banana, the sweeter and easier it is to work with.
3. Mix Wet Ingredients
Stir in peanut butter, egg, and applesauce until the mixture is creamy and well combined.
4. Add the Flour
Gradually mix in the oat flour until a soft dough forms. If it’s sticky, add a little more flour.
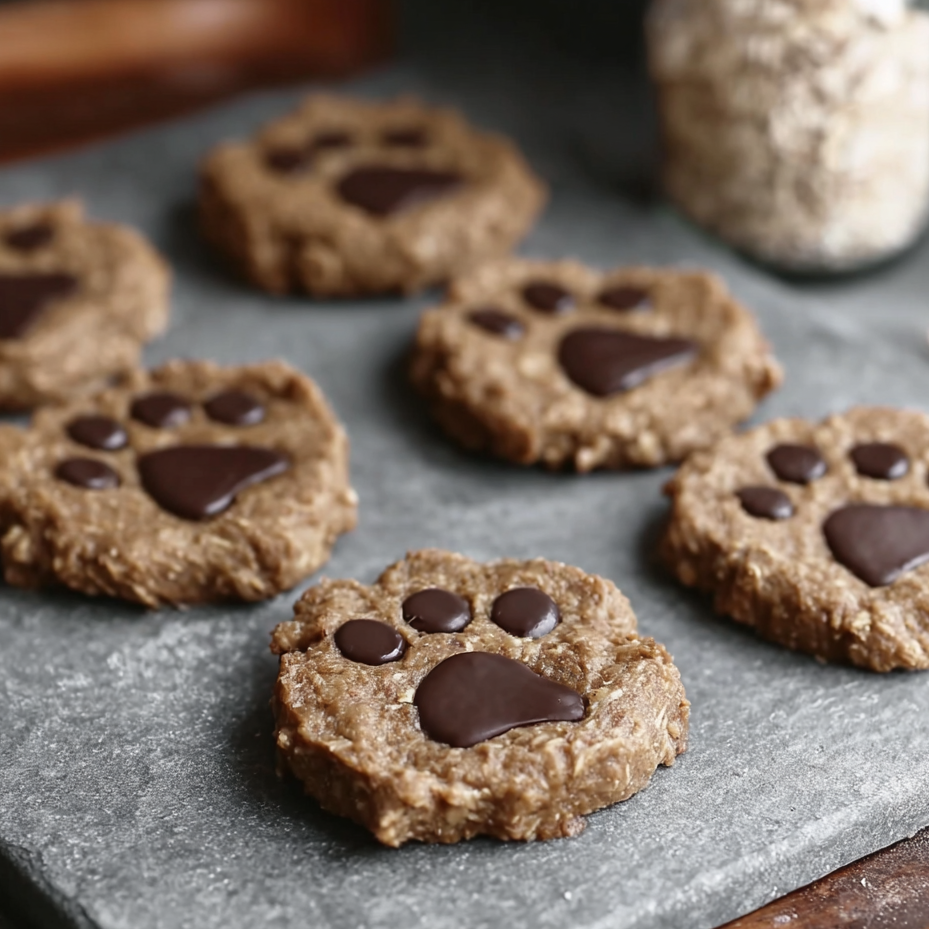
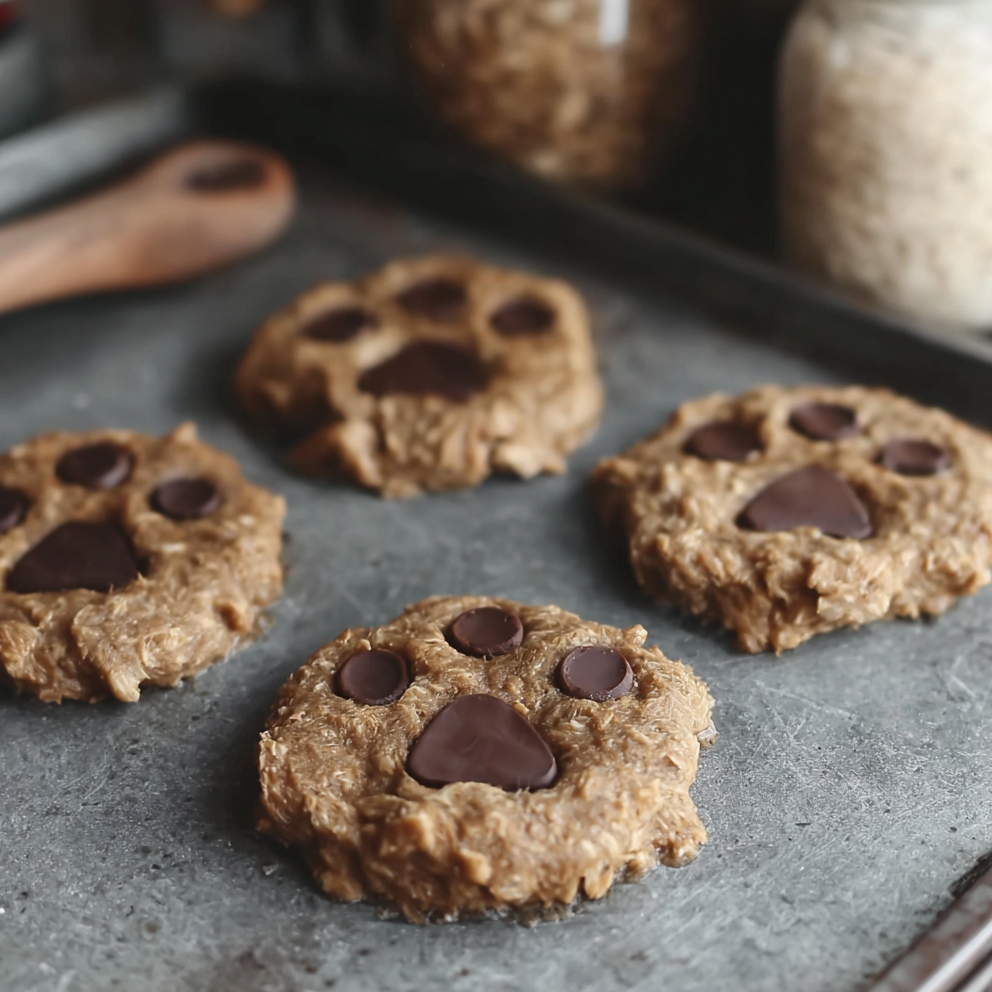
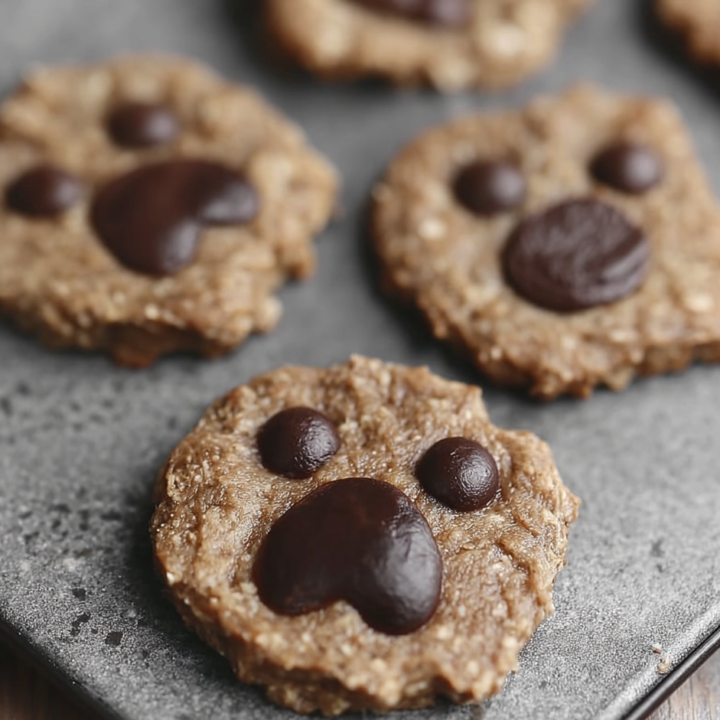
5. Shape the Cookies
Roll dough into small balls (about 1–2 tablespoons each). Place on the baking sheet and flatten slightly. Press a paw-print shape into each cookie. Add carob chips if desired.
6. Bake
Bake for 15–20 minutes, until firm and lightly golden. Cool completely before serving.
Baking Tips for Best Results
- Check Your Peanut Butter: Always confirm it’s free of xylitol, which is toxic to dogs.
- Adjust Texture: Bake a few minutes longer for crunchier cookies, or slightly less for softer treats.
- Storage: Keep cookies in an airtight container for up to a week, or freeze for longer storage.
Why Dogs Love These Cookies
The banana and peanut butter combination is a guaranteed hit. Every time these bake, tails start wagging before they even come out of the oven. The paw-print shape adds a playful touch that makes them just as fun to give as they are to eat.
Want to switch things up? Try adding pumpkin, blueberries, or a pinch of cinnamon (dog-safe in small amounts) for variety.
Creative Variations & Seasonal Ideas
- Holiday Twist: Add a pinch of cinnamon or ginger for cozy, seasonal flavor.
- Summer Treat: Use coconut flour and mix in unsweetened shredded coconut.
- Birthday Cookies: Decorate with a dog-safe frosting made from Greek yogurt and peanut butter.
- Frozen Treats: Press dough into silicone molds and freeze for a cool snack on hot days.

Ingredient Safety Reminders
- Always avoid xylitol and added sugars
- Introduce new ingredients slowly
- Treats should make up no more than 10% of your dog’s daily calories
Storage Instructions
Room Temperature:
Store in an airtight container for 3–5 days.
Freezer:
Freeze in a sealed container for up to 3 months. Thaw before serving—or serve slightly chilled in warm weather.
A Labor of Love
These Banana Peanut Butter Dog Paw Cookies are more than just treats they’re little reminders of how much we care. From the eager sniffing while they bake to the happy crunch of the first bite, it’s clear that homemade treats make ordinary days feel special.
Grab your apron, mash those bananas, and bake something your pup will love just as much as the time you spent making it. 🐾💛
Banana Peanut Butter Dog Cookies Recipe
If you’ve ever looked into your dog’s eyes and felt the urge to spoil them just a little more, you’re definitely not alone. Making homemade dog treats isn’t just about snacks it’s about celebrating the bond we share with our pups. That’s exactly how these Banana Peanut Butter Dog Paw Cookies came to life.
They’re wholesome, easy to make, and shaped like adorable paw prints for an extra dose of charm. With simple, dog-safe ingredients and a flavor combo dogs love, these cookies are perfect for everyday treating or special occasions.
Ingredients
- 1 ripe banana, mashed
- ½ cup natural peanut butter (xylitol-free)
- 1 large egg
- 1 cup oat flour (or finely blended rolled oats)
- ¼ cup unsweetened applesauce
- Optional: dog safe carob chips for decoration
Instructions
1. Preheat & Prepare
Preheat your oven to 325°F (165°C) and line a baking sheet with parchment paper.
2. Mash the Banana
In a mixing bowl, mash the banana until smooth. The riper the banana, the sweeter and easier it is to work with.
3. Mix Wet Ingredients
Stir in peanut butter, egg, and applesauce until the mixture is creamy and well combined.
4. Add the Flour
Gradually mix in the oat flour until a soft dough forms. If it’s sticky, add a little more flour.
5. Shape the Cookies
Roll dough into small balls (about 1–2 tablespoons each). Place on the baking sheet and flatten slightly. Press a paw-print shape into each cookie. Add carob chips if desired.
6. Bake
Bake for 15–20 minutes, until firm and lightly golden. Cool completely before serving.
Notes
- Always use xylitol-free peanut butter, as xylitol is highly toxic to dogs.
- For crispier cookies, extend the baking time slightly; for softer treats, bake a bit less.
- Store cookies in an airtight container for up to one week, or freeze for up to three months to keep them fresh.
Nutrition Information:
Yield: 12 Serving Size: 1 cookieAmount Per Serving: Calories: 90Total Fat: 4gSaturated Fat: 1gTrans Fat: 0gUnsaturated Fat: 3gCholesterol: 10mgSodium: 15mgCarbohydrates: 10gFiber: 1gSugar: 2gProtein: 3g