1. A Sweet Story from My Kitchen to Yours
There’s something incredibly special about baking for a dog you love. One of my favorite childhood memories is standing in my grandmother Selima’s kitchen, sneaking ripe strawberries from her summer garden while she prepared rustic biscotti. Her kitchen was always filled with warmth, laughter, and the belief that food made with love simply tastes better.
Years later, as my golden retriever Benji sat patiently beside me, hoping for a bite of my fruit salad, inspiration struck. Why not create a homemade treat just for him one that carries the same simplicity, care, and tradition I grew up with?
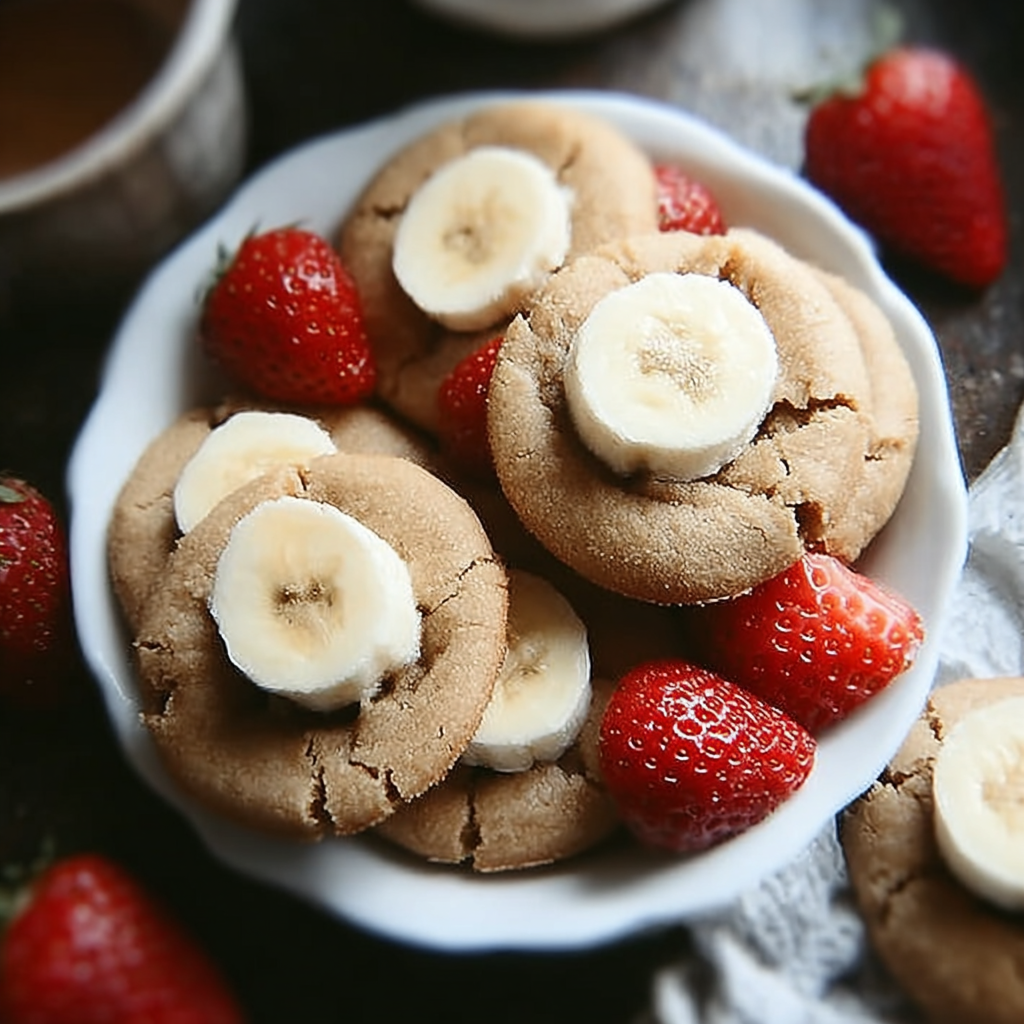
These Strawberry Banana Dog Cookies are more than a snack. They’re a heartfelt blend of family memories and modern, dog-safe nutrition. Inspired by sun-soaked Italian summers and adapted for today’s home kitchen, this recipe transforms fresh strawberries and bananas into wholesome treats your pup will happily wag for.
2. Why Strawberries and Bananas Are a Perfect Pair for Dogs
Strawberries and bananas aren’t just delicious—they’re packed with nutrients that support your dog’s overall health.
Strawberries
- Vitamin C: Supports immune health
- Fiber: Promotes healthy digestion
- Natural enzymes: May help keep teeth cleaner
Bananas
- Potassium: Supports heart and muscle function
- Vitamins B6 & C: Aid energy and immune support
- Low sodium and cholesterol: Ideal for dog-friendly snacks
Together, these fruits create a naturally sweet, nutritious base without the fillers or additives often found in store bought treats.
3. Ingredients & Prep Time
Ingredients (Makes about 12 cookies)
- 1 cup fresh strawberries, hulled and chopped
- 1 ripe banana, mashed
- 1½ cups whole wheat flour (or oat flour for sensitive pups)
- ¼ cup rolled oats
- 1 egg
- 1 tablespoon coconut oil (optional, for moisture and coat health)
Time Needed
- Prep: 10 minutes
- Bake: 20 minutes
- Cool: 15 minutes
- Total: ~45 minutes
4. Step-by-Step Instructions
Step 1: Preheat the Oven
Preheat your oven to 350°F (175°C). Line a baking sheet with parchment paper.
Step 2: Mash the Fruit
Mash the banana in a bowl until smooth. Add the strawberries and gently mash to create a slightly chunky puree.
Step 3: Add Egg and Oil
Whisk in the egg until fully combined. Stir in coconut oil if using it helps bind the dough and adds healthy fats.
Step 4: Mix in Dry Ingredients
Gradually fold in the flour and oats. Mix until a soft dough forms.
- Too sticky? Add a little more flour.
- Too dry? Add a splash of water or extra mashed banana.
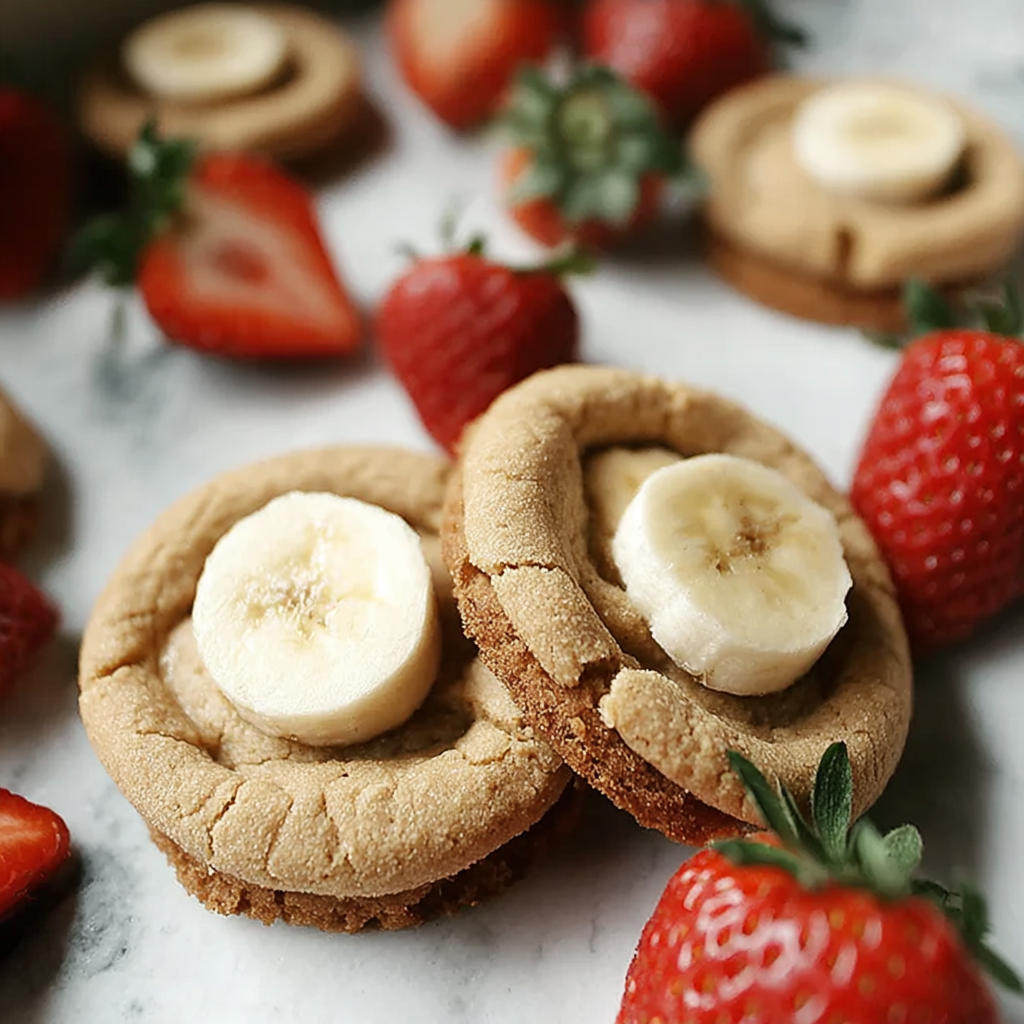
Step 5: Shape the Cookies
Roll the dough out to about ½ inch thick. Cut into shapes or small squares your dog will love them either way.
Step 6: Bake
Bake for 18–22 minutes, until golden and firm. For crunchier cookies, leave them in the warm oven with the door slightly open after baking.
Step 7: Cool Completely
Let cookies cool fully before serving or storing.
5. Storage Tips & Shelf Life
Because these cookies contain fresh fruit, proper storage is important.
Refrigerator:
Store in an airtight container for up to 7 days.
Freezer:
Freeze in a sealed container or bag for up to 2 months. Thaw at room temperature before serving.
Always check for mold or off smells before giving treats to your dog.Safety Tip:
Always check for mold or off smells before giving treats to your dog.
6. Customizing for Allergies & Preferences

This recipe is easy to adapt for different dietary needs.
Gluten-Free:
Use oat flour or rice flour.
Grain-Free:
Try coconut or almond flour (reduce quantity and add moisture slowly).
Healthy Add-Ins:
- Chia seeds or ground flaxseed (omega-3s)
- Shredded carrots or apples
- Unsweetened, xylitol-free peanut butter
Avoid at All Costs:
Sugar, chocolate, raisins, artificial sweeteners, or xylitol.
7. Why Homemade Dog Treats Are Worth It
Making treats at home offers benefits store-bought options simply can’t match:
- Full ingredient control with no hidden additives
- Better freshness and nutrition
- More budget-friendly than premium commercial treats
- Customizable for your dog’s specific needs
- A bonding experience that your dog can truly taste
8. Final Thoughts
These strawberry banana dog cookies are a simple reminder that love often shows up in the smallest ways. Whether you’re baking on a sunny afternoon or prepping treats for the week, each batch is a little gift of care for your furry companion.
Dogs may not read ingredient labels, but they know when something is made just for them. And that wagging tail says it all.
If you try this recipe, I’d love to hear how it went! Did your pup have a favorite shape or add-in? Share your experience in the comments and let’s inspire more homemade goodness for our four-legged friends 🐾🍓🍌

Homemade Strawberry Banana Cookies for Dogs
There’s something incredibly special about baking for a dog you love. One of my favorite childhood memories is standing in my grandmother Nonna Lucia’s kitchen, sneaking ripe strawberries from her summer garden while she prepared rustic biscotti. Her kitchen was always filled with warmth, laughter, and the belief that food made with love simply tastes better.
Years later, as my golden retriever Luca sat patiently beside me, hoping for a bite of my fruit salad, inspiration struck. Why not create a homemade treat just for him one that carries the same simplicity, care, and tradition I grew up with?
These Strawberry Banana Dog Cookies are more than a snack. They’re a heartfelt blend of family memories and modern, dog-safe nutrition. Inspired by sun-soaked Italian summers and adapted for today’s home kitchen, this recipe transforms fresh strawberries and bananas into wholesome treats your pup will happily wag for
Ingredients
- 1 cup fresh strawberries, hulled and chopped
- 1 ripe banana, mashed
- 1½ cups whole wheat flour (or oat flour for sensitive pups)
- ¼ cup rolled oats
- 1 egg
- 1 tablespoon coconut oil (optional, for moisture and coat health)
Instructions
Step 1: Preheat the Oven
Preheat your oven to 350°F (175°C). Line a baking sheet with parchment paper.
Step 2: Mash the Fruit
Mash the banana in a bowl until smooth. Add the strawberries and gently mash to create a slightly chunky puree.
Step 3: Add Egg and Oil
Whisk in the egg until fully combined. Stir in coconut oil if using it helps bind the dough and adds healthy fats.
Step 4: Mix in Dry Ingredients
Gradually fold in the flour and oats. Mix until a soft dough forms.
- Too sticky? Add a little more flour.
- Too dry? Add a splash of water or extra mashed banana.
Step 5: Shape the Cookies
Roll the dough out to about ½ inch thick. Cut into shapes or small squares your dog will love them either way.
Step 6: Bake
Bake for 18–22 minutes, until golden and firm. For crunchier cookies, leave them in the warm oven with the door slightly open after baking.
Step 7: Cool Completely
Let cookies cool fully before serving or storing.
Notes
Always check for mold or off smells before giving treats to your dog.